
T-Shirt Manufacturing Step by Step: Twelve Stages From Yarn to Packed Carton
T-shirt manufacturing runs from yarn and knitting to printing, QC and packing. Follow the twelve stages, the decisions locked at each, and the checks that prevent…

A T-shirt passes through twelve stages between yarn and the packed export carton, and the choices that decide its quality are concentrated in the first four and the last three. The sequence below is the one a factory actually runs, with the decision that gets locked at each stage and the check that prevents the fault from travelling downstream.
Stage 1-2: yarn and fabric knitting
Yarn is spun, then knitted into fabric.
Fibre selection and knitting fix the weight, the hand and the shrinkage behaviour of the finished shirt, and both are decided before any cutting is discussed.
Cotton, cotton blends, polyester blends and viscose are spun to different counts and then knitted at a defined gauge and weight, so the same fibre can produce a light summer jersey and a heavy streetwear body. Ask for the composition by percentage and the weight in grams per square metre, because those two numbers predict how the shirt will drape, how opaque it will be and how it will price. Ask also whether the yarn is a quality the factory runs continuously, since a running quality comes with accumulated knowledge of how it knits, dyes and grades. Where the fabric is being developed for the order rather than selected from a standard range, this stage needs its own approval before the pattern is finalised, because a change in the knit moves the measurements.
Stage 3: dyeing or garment dyeing
Colour is applied to fabric or to the sewn garment.
Piece dyeing colours the fabric before cutting, while garment dyeing colours the finished shirt, and the two routes produce different shrinkage, different lead times and different measurement risk.
Piece dyeing is the common route and the easier one to control, because the fabric is measured after dyeing and the pattern is cut from fabric whose shrinkage has already been released. Garment dyeing produces a softer, more washed hand and allows small runs of many colours, but it moves the shrinkage into the finished shirt, so the measurements have to be checked after the process rather than before and the size chart has to be built around it. Ask which route is quoted, what the measured shrinkage is after a defined wash cycle, and how the shade is compared against the approved standard. Where the buyer supplies a colour reference, the approval belongs here rather than later, because a shade locked at the fabric stage prevents arguments at packing.
Stage 4: cutting and fabric spreading
Fabric is spread in layers and cut to the marker.
The marker determines fabric consumption and the spreading and cutting determine whether the pieces match the pattern within tolerance, which is why a cutting fault surfaces as a fit complaint.
Fabric is rolled out in a lay of many plies and cut with a straight knife or a die, and the accuracy of that cut sets the seam allowance the sewing line will work with. A lay that has shifted produces panels that are slightly short, and the line compensates by stretching, which then shows up as a twisted side seam or a hem that is not level. Ask how the fabric is relaxed before spreading, how many plies are in a lay and how the pieces are bundled and numbered so that a single garment is assembled from a single shade. On an order with several colours, the lot allocation decided at cutting determines whether a customer can receive two different shades of the same style.
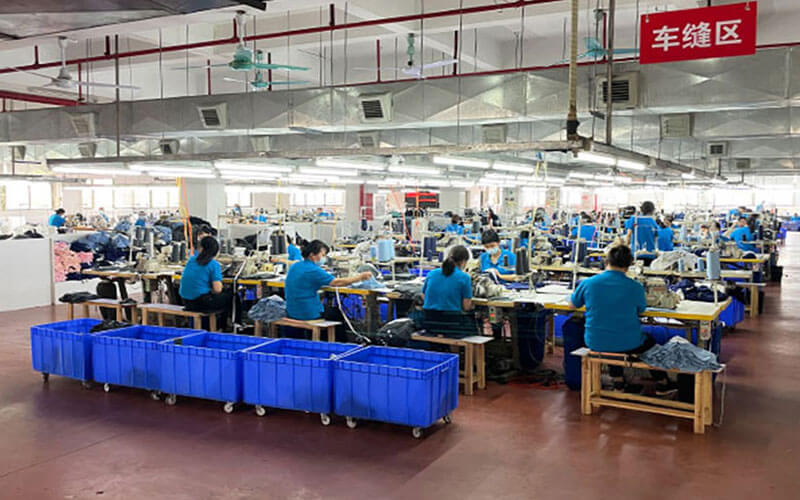
Stage 5: sewing and assembly
Panels are joined in sequence on a line.
Assembly determines seam strength and how the shirt hangs, and it is where most of the visible defects on a T-shirt are created rather than detected.
A T-shirt is assembled in a fixed order: shoulders, sleeves, side seams, then the neck, then the hems. Each operation has a machine and a stitch specification, and each one introduces a small amount of distortion that the next operation inherits. Ask which stitch is specified at the shoulder seam, because that is the seam carrying the weight of the garment and it is the first to fail if the stitch does not stretch with the knit. Ask how the line is balanced, since an unbalanced line pushes work to the following operation and the fault travels. This is the stage where in-line inspection earns its cost, because a seam error can be corrected while the shirt is on the table and cannot be corrected once it is folded.
Stage 6: collar, cuff and hem finishing
Edges are bound and hems are turned.
The neck rib and the hems are the two places a customer notices quality first, because the neck is what they see when they look in the mirror and the hem is what they feel on the wrist.
The neck is where a T-shirt most often fails, and the failure is almost always recovery rather than construction. Ask what the rib composition is and what proportion of elastane it contains, because a rib with too little recovery will ripple after the first wash and a rib with too much will pucker on the machine. Ask how the neck is attached and whether it is taped, since taping stabilises the shoulder-to-neck junction and reduces the chance of the neck stretching during wear. For the hems, ask for the turn depth and the stitch, then check a washed sample rather than a pressed one, because a hem that has been pressed flat in the sample room can behave differently once it has been through a domestic cycle.
Stage 7: printing, embroidery and decoration
Marks are applied to the assembled garment.
The decoration method determines the artwork that can be reproduced and the price at which it can be run, so it belongs in the specification rather than in a late request.
Screen printing carries cost in the screens, which makes it efficient at volume and awkward at small quantities; direct-to-garment printing carries no setup and suits short runs, but the print sits on the surface and has to be specified to survive washing; transfers and embroidery each bring their own constraints on artwork density and placement. Ask which method is quoted, how the print is washed and tested before bulk, and where the placement is measured from so that it can be repeated. On a garment that will be sold online, ask for a photograph of the washed article rather than the sample, because the first laundry cycle is what determines whether the product earns reviews or returns. Where the shirt is garment dyed, the decoration order changes and the print has to be applied after dyeing.
Stage 8: washing, softening and finishing
The garment is washed or treated to set its final hand.
Washing removes residual chemistry, releases remaining shrinkage and sets the surface the customer will actually feel when the parcel is opened.
A silicone wash, an enzyme wash or a simple softener each produce a different surface, and the effect interacts with the fabric weight and the dye route. Ask which treatment is applied and whether it is applied to the fabric or to the sewn garment, because the choice changes both the cost and the shrinkage. This stage is also where a fragrance or a hand feel can be introduced that a customer notices before they notice the stitching, so it is worth specifying rather than leaving to a default. Ask what the measured shrinkage is after the treatment and after a defined number of wash cycles, and treat that figure as the number the size chart is built on.
Stage 9: pressing and folding
The garment is pressed and prepared for packing.
Pressing determines the shape the customer sees in the parcel, and folding determines whether the shirt photographs well and whether it fits the carton efficiently.
A flat press, a steam tunnel or a vacuum table each produce a different finish, and the choice interacts with the fabric: a delicate knit can be marked by a press plate, while a heavy cotton body needs pressure to look crisp. Ask how the shirt is folded and whether the fold is designed around the packaging, because a fold that suits a poly bag will not suit a retail carton and vice versa. Where the shirt carries a hangtag or a neck label, this is the stage where it is attached, and it is the last point at which a mislabelled garment can be removed from the order without opening a carton.
Stage 10: inspection
Finished goods are inspected against an acceptance level.
Final inspection applies a sampling plan and a defect classification to the order, and it is the last chance to find a fault before the goods are packed.
Ask how many pieces are drawn from the order, what acceptance quality level is applied, and how defects are classified into critical, major and minor. Ask also what the remedy is if the inspection fails, because an inspection without a consequence is a report rather than a control. On a T-shirt the checks that matter most are the neck recovery after washing, the measurement against the graded specification, the print adhesion, and the shade against the approved standard. Requiring a washed sample at this stage rather than a pressed one is what turns the inspection into useful evidence, because most of the faults a customer will report only appear after laundering.
Stage 11: labelling and packing
The care and content labels are attached and the goods are packed.
Labelling is a compliance step rather than a finishing step: the content and care information must be permanent, legible and correct for the market where the shirt will be sold.
Ask who supplies the label artwork and who checks the fibre content against the fabric actually used, since the two can diverge when a fabric is substituted during production. Ask how the label is attached, because a heat transfer has to be applied at a temperature and pressure that suit the fabric and a careless application marks the neck. Packing should be specified at the same time as the garment, because the format affects the carton, the freight and the labour, and a pack that has to be assembled by hand adds a cost that never appears in the garment quotation. Where the order is packed in bulk, the bagging and sorting happen somewhere, and the factory is usually the cheaper and more controllable place.
Stage 12: carton, documentation and shipment
The order is cartoned to specification and staged for loading.
The final stage converts a production run into a shipment, and the decisions made here determine whether the goods travel without damage and clear the destination without delay.
Ask for the carton dimensions, the carton weight and the pack ratio with the quotation, because on a light and bulky product the carton efficiency is a direct freight cost. Confirm which documents the factory prepares and which the buyer arranges, since a gap in that list delays the shipment at the port rather than at the factory. Where a pre-shipment inspection is arranged, the timing matters: too early and the goods are incomplete, too late and the container is already booked. Where the goods are sold online, ask for the carton marking that identifies the style, colour and size breakdown, because that is what allows a receiving team to put stock away without opening every carton.
Rework: where the cost hides and how to prevent it
Rework is the cost that never appears in a quotation.
Every stage that has to be repeated consumes machine time that was allocated to another order, and the cost is absorbed either by the margin or by the schedule.
The stages that generate the most rework on a T-shirt are the neck, the print and the measurement. A neck that fails recovery after washing cannot be repaired economically, a print that does not adhere has to be removed or the garment abandoned, and a measurement that drifts outside tolerance either passes as a second or is remade. Ask the factory which defects generated the most rework in the last six months and what changed as a result, because that answer reveals where the process is genuinely weak. The prevention is unglamorous: approve the fabric and the wash before cutting, wash-test the decoration before bulk, measure a size set rather than a single size, and record every approval so that a later disagreement can be settled with a document rather than a recollection.
FAQ
What is the order of T-shirt production steps?
Yarn and knitting, dyeing, cutting and spreading, sewing and assembly, collar and hem finishing, decoration, washing, pressing, inspection, labelling and packing, then cartoning and shipment. The decisions that constrain everything downstream are the fabric specification and the dye route.
Which stage causes the most T-shirt quality failures?
The neck, the decoration and the measurement. Neck rib recovery after washing, print adhesion and drift against the graded specification account for most of the faults a customer reports, and all three are decided before final inspection.
Does garment dyeing change the size chart?
Yes. Garment dyeing releases shrinkage in the sewn shirt rather than in the fabric, so the measurements have to be checked after the process and the pattern has to be built around the shrinkage the route produces. It is a different production plan rather than a variation on piece dyeing.
Where should a buyer intervene to prevent rework?
At the fabric and wash approval, at the size set, and at a washed decoration test before bulk. Those three points sit before the expensive stages, which is what makes intervening there cheaper than inspecting finished cartons.
Next step for your team: send the Finetex Global team your T-shirt specification and ask which stages would apply to your order, which approvals are required before cutting, and how the decoration would be wash-tested.
Sources: OEKO-TEX STANDARD 100; 16 CFR Part 303 textile labelling; Supima — extra-long staple cotton; TENCEL™ branded lyocell fibre; Textile Exchange standards.
More factory-floor notes for brand owners

Sample Revision Limits: How to Control Underwear Development Cost and Calendar
A sample revision limit should control scope, not block necessary correction. The buyer and factory need to distinguish…
Read more →
Lab Dips and Strike-Offs for Underwear: Approval Steps That Prevent Delays
A lab dip approves a dyed textile shade; a strike-off approves printed artwork on the intended substrate. They…
Read more →
Color MOQ Planning: How to Share Fabric Across Multiple Underwear Styles
Color MOQ planning works best when a brand treats dyed fabric as a shared material platform rather than…
Read more →
Underwear Fabric Utilization: How Marker Efficiency Changes Unit Cost
Fabric utilization converts a fabric quotation into a garment cost. The calculation must account for pattern area, fabric…
Read more →
Open Costing for Men’s Underwear: Reading Fabric, Trim, Labor and Overhead Lines
An open-cost sheet is useful only when every line is tied to a measurable specification, a purchasing unit…
Read more →Global Apparel Sourcing Outlook 2026: Cotton, Freight and Supply-Chain Risk
A data-led 2026 apparel sourcing outlook on cotton balances, freight volatility, supplier diversification, lead time, compliance and practical…
Read more →Request a sample & pricing information
Send us your tech pack, target price or a reference sample — we reply with a quotation, a realistic lead time and a fabric recommendation within one working day.
- Free sampling plan & cost breakdown
- MOQ from 300 pcs per style
- Reply within 1 working day