
Neckline Stability: Rib, Taping and Interlining
Three process options for a stable knit neckline after wash: rib density, stay tape and interlining, and how a wavy neck starts.
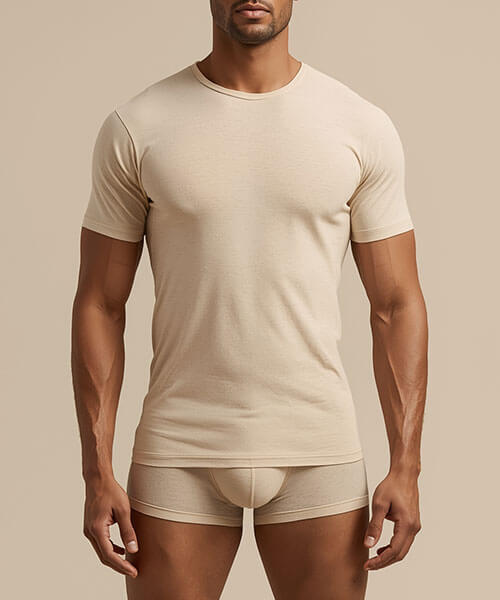
Answer first: A knit neckline stays flat after wash when the rib, the sewing, and any added support are specified together. There are three process options: a rib with enough density and recovery to hold the opening on its own; a stay tape or shoulder-and-neck tape that stops the seam from growing; and a light interlining or fusible in the rib or at the seam, used only where it will not print through. Most wavy necks come from stretching the rib onto a larger opening, from a rib that is too soft for the body fabric, or from a support that was never washed in development. This article sets out the three options and how to test them. It is a process companion to our earlier guide on why a T-shirt neck rib stretches out, which explains the growth problem; this one covers the construction remedies.
The points below are factory-side methods, not laboratory certificates. Where a test method is named, it is named only as a method title, not as a result we claim to have measured. We do not publish shrinkage, recovery or stretch figures for Finetex necks. Sampling follows the published route on our T-shirt manufacturing page: a development sample in 5–7 working days after artwork and fabric are confirmed, and a size set in 10–12 working days.
Three ways to stabilise a knit neck
A crew, scoop or Henley neck is a stretched loop of rib sewn to a cut opening. The opening wants to grow; the rib wants to recover. Stability is the balance between those two, plus whatever tape or interlining you add.
| Method | What it does | Where it fits | Main risk if misused |
|---|---|---|---|
| Rib density and recovery | The rib itself holds the opening and returns after being worn or washed | Most mid-weight cotton and cotton-blend crews, when the rib is specified and not only “matched by eye” | A soft, low-density rib looks clean at approval and waves after wash |
| Stay tape or neck-and-shoulder tape | Limits growth of the neck seam and the shoulder seam that feeds into it | Openings that are wide, fabrics that grow, or light jerseys that cannot carry a heavy rib | Tape that is too stiff, too wide, or applied with the neck stretched, which then puckers |
| Interlining or a light fusible | Adds body to the rib, the facing, or a short run of the seam | Finer ribs, performance fabrics, or placket junctions (for example a Henley) | Print-through, a hard edge, or a fusible that softens or bubbles after wash |
These are not three badges to apply at once “for safety.” Each one adds thickness and a new failure mode. Choose the lightest combination that holds the washed sample, then lock it in the tech pack.
Rib density, width and how the rib is set on
The first option is to get the rib right, which is still the most common fix and the one most often skipped. “Use a rib” is not a specification. A useful rib call-out includes the yarn, the gauge or a density description, the width of the band, the fold, and whether the rib is a tubular collar, a cut-and-sewn band, or a bound neck.
Density matters because a fine, open rib can be pulled to almost any neck circumference at the machine. It will look smooth in the sewing audit and then grow, roll or wave once the fabric relaxes after wash. A denser rib, set on with a controlled ratio, has less spare stretch to give away. The width has to be in proportion to the body: a wide, soft band on a light jersey is a frequent source of a lettuce edge.
The set-on ratio is the other half of the method. If the cut neck is larger than the rib can recover, the operator will stretch the rib to meet the opening. That stretch is then sewn in, and the wash simply reveals it. The remedy is to correct the neck opening on the pattern, or to use a rib that is specified for that opening, not to pull harder. This is the same root cause described in the stretching-out article: growth that was built in at sewing, not only a fibre that “relaxed.”
On a washed development sample, check four things before you change anything else:
- Does the neck sit flat, or does it wave in a regular rhythm (often a sign of stretch-on or of a rib that is too weak)?
- Has the neck circumference grown beyond the approved measurement, and by how much relative to the tolerance on your chart?
- Has the rib rolled or flipped?
- Is the width still even at the front, the back and the shoulders?
If the rib itself is the problem, changing tape later will often only hide part of the wave or add puckering. Fix the rib and the opening first.
Stay tape, and when the shoulder has to be included
A stay tape is a narrow tape, usually a woven or knitted tape or a specific neck tape, sewn into the neck seam, and often into the shoulder seam that runs into the neck. Its job is to stop those seams from extending in wear and wash. It is the right tool when the body fabric grows more than the rib can control, when the neck opening is wide (a scoop, a wide crew, some women’s or boxy blocks), or when the shoulder slope feeds stretch into the neck.
Application is as important as the tape choice:
- Apply the tape to the neck at the approved circumference, not to a stretched opening.
- Keep the tape narrow enough that it does not print a ridge on a light jersey.
- Carry the tape into the shoulder if the shoulder seam is also growing; a stable neck on a stretching shoulder will still drop or twist.
- Match the tape’s recovery to the fabric. A rigid tape on a very stretchy body can pucker; a tape that stretches as much as the jersey adds no control.
Tape is a process, not a trim to be added only on the pre-production sample. If you decide it is needed, it belongs in the first development sample and in the bill of materials, with a supplier and a width. A “use tape if the neck grows” note on a comment sheet is how two bulk lots are sewn differently.
Interlining, used sparingly
A light interlining or fusible can stiffen a rib, a placket junction, or a short section of a bound neck. It is the most specific of the three options and the easiest to overuse. On a Henley or a polo-related collar join, a narrow support in the placket or at the rib join can keep the first button stance from collapsing. On a plain crew, a fusible in the rib is rarely the first choice; a better rib usually is.
If you use a fusible, wash it in development. Some fusibles soften, bubble or strike through after heat and water. A sew-in, very light interlining avoids some of those risks and adds a seam that must be kept inside the rib fold. In either case, specify the product, the width and the position, and approve it on both the face and the inside of a washed sample. Do not invent a “standard interlining” for all necks.
Wash-test the recipe, then write it down
A neck that is approved dry is not approved. The development sample should be washed by the method you expect the customer to use, or by the care method you will put on the label, and then measured against the same points used in your knit-top measurement chart. If you use a laboratory or in-house dimensional-change method, name the method and the wash conditions in the tech pack. We do not attach invented percentages or a claimed pass mark to any method here.
A practical approval sequence is:
- Sew the neck in the bulk or the approved substitute fabric, with the candidate rib, and no extra support.
- Wash, dry and measure. If it is stable, lock the rib and the set-on ratio.
- If it has grown or waved, adjust the opening and the rib first; only then add tape.
- If a junction (a placket, a binding, a very fine rib) still collapses, trial a narrow interlining on a new sample and wash it again.
- Write the winning combination into the tech pack: rib specification, set-on ratio, tape or interlining product and position, and the wash method used to approve it.
Bulk production, once the pre-production sample is approved, runs 15–45 days from deposit, depending on quantity, fabric and trims. The support materials are trims; if they have a lead time, they belong on the critical path with the fabric, not as a last-week addition.
What is fact, what is advice and what is uncertain
Fact: Finetex’s published sampling times, bulk lead time and T-shirt manufacturing route are as cited from the live pages above. This article does not publish test results, recovery percentages or a Finetex neck “formula.”
Advice: the three-option framework, the four visual checks, and the wash-then-write sequence are our practical process reading. They complement, and do not replace, the diagnosis in the stretching-out article.
Uncertain: the combination that works depends on the body fabric, the block and the wash method. A recipe that held on a mid-weight cotton crew will not automatically hold on a viscose or a stretch jersey. Confirm it on a washed sample of the actual quality.
Related reading
- Garment Measurement Points for Knit Tops: The 12 Numbers Buyers Argue About
- Grading Rules for Knit Tops: Where Size Sets Fail
- Men’s Polo Shirt Manufacturing: Pique, Interlock and Collar Construction
Frequently asked questions
Why does a neck look fine at sewing and wavy after the first wash?
The rib was often stretched onto an opening it cannot recover, or the rib is too soft for the body fabric. Wash reveals growth that was sewn in. Correct the opening and the rib before adding tape.
Should every T-shirt neck have stay tape?
No. Tape is useful when the fabric or the opening grows more than the rib can control, or when the shoulder seam feeds stretch into the neck. On a well-specified mid-weight crew, a correct rib and set-on ratio are often enough. Unnecessary tape can pucker or print through.
When is interlining the right choice?
When a junction needs a little body — a Henley placket meeting a rib, a very fine rib, or a bound neck that collapses — and only after the rib and tape decisions are already clear. Always wash the fusible or sew-in on a sample; do not assume it will survive the customer’s wash.
What should the tech pack say about the neck?
The rib yarn and density or gauge, the band width, the set-on ratio, any tape or interlining with product and position, the neck measurements and tolerances, and the wash method used to approve the sample.
Sources
- Finetex: T-shirt neck rib stretching out
- Finetex: Custom T-shirt manufacturer
- Finetex: Garment measurement points for knit tops
- Finetex: T-shirt fit and fabric guide
Ask for a neck recipe on your next T-shirt
Send the fabric quality, the neck shape and any wash complaint you are trying to close. We will sample the rib, and tape or interlining only if the washed rib needs it, and return a development sample you can measure.
Request a quote or start from our T-shirt manufacturing page.
More factory-floor notes for brand owners
Selling Underwear in Germany: Textilkennzeichnung, LUCID and Packaging Law
German textile labelling, LUCID registration and packaging law for underwear brands after the PPWR and VerpackDG took effect…
Read more →
GSM to Ounce Converter and Fabric Weight Chart
Convert fabric weight between gsm and oz/yd² with the exact factor (1 oz/yd² = 33.906 g/m²), a T-shirt…
Read more →
First-Output Check: The In-Line Inspection That Saves Bulk
What to check on the first garments off each line: measurements, seams, labels and print against the approved…
Read more →
A Fit Session Protocol for Knit Tops: 12 Wearers, 5 Measurements
A recommended fit session protocol for knit tops: recruit 12 wearers, take five measurements, run a movement checklist,…
Read more →
Corporate Uniform Programs: Tendering, Sizing and Reorders
How to run a corporate uniform program with a factory: tender documents, sizing a workforce, producing many sizes…
Read more →
Muscle Fit and Athletic Fit T-Shirts: Pattern Changes That Matter
How muscle fit and athletic fit T-shirts differ from a classic block: chest-to-waist drop, sleeve cap and bicep,…
Read more →Request a sample & pricing information
Send us your tech pack, target price or a reference sample — we reply with a quotation, a realistic lead time and a fabric recommendation within one working day.
- Free sampling plan & cost breakdown
- MOQ from 300 pcs per style
- Reply within 1 working day