
A Fit Session Protocol for Knit Tops: 12 Wearers, 5 Measurements
A recommended fit session protocol for knit tops: recruit 12 wearers, take five measurements, run a movement checklist, score zones and decide what to change.
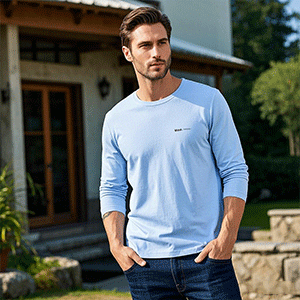
Answer first: A fit session turns “it feels tight” into a pattern change. This protocol is a recommendation for brands developing T-shirts and other knit tops; it is not a test Finetex has run or a published standard. Recruit 12 wearers who match your target customers, spread across your core sizes. Record 5 body and garment measurements for each wearer: chest, waist, shoulder width, upper arm (bicep) and body length. Have each wearer perform the same movement checklist in the sample, then score each body zone on a defined 1–5 scale and note comments in their own words. Combine the scores with the measurements to decide, zone by zone, whether to keep the pattern, change ease or grading, or change the fabric. Twelve wearers is a practical number for one day of fittings, enough to see more than one body per size. It is not a statistically representative sample, so treat the result as evidence for a pattern decision, not as a market forecast.
Why a protocol beats a single fit model
A fit model is one body. A pattern that fits one person well can still fail half your customers if their proportions differ. A fit session with several wearers shows which problems are caused by the pattern (most wearers report them in the same zone) and which are caused by an individual body.
A written protocol also makes sessions comparable. If round two uses the same wearers, movements and scale as round one, the change in scores is attributable to the pattern change. Our article on garment measurement points for knit tops defines the garment points; this protocol adds the people.
Before the session: samples, roles and room
Preparation decides whether the data is usable.
- Samples. Have every size in the session made in the intended bulk fabric, or the closest available, with the correct trims and neck rib. A fit result on the wrong fabric does not transfer. Label each sample with size and round number, and measure it before the session so you know what each wearer is actually wearing.
- Spare sizes. Have the size above and below available. If a wearer is between sizes, record which one they choose and why; that choice is itself data for the size chart.
- Roles. One person measures bodies, one leads the movements and records fitter observations, and one enters scores. Keep the same people across rounds where possible.
- Room and time. A private changing space, a mirror, a chair and enough room to raise arms and bend. Allow time per wearer for measurement, two sizes and the movement list, and schedule breaks so the last wearer gets the same attention as the first.
- Same conditions each round. Same underlayer guidance, same time of day if possible, and the same instructions read aloud.
Step 1: Recruit the wearers
Who to recruit
- Match the target customer. Age range, build and activity level should resemble the people who will buy the product. For a gym brand, recruit people who train; for a workwear programme, people who do the job.
- Spread across sizes. With 12 wearers and three core sizes, aim for four per size. With five sizes, put more wearers in the best-selling sizes and at least one in each end size.
- Include different builds within a size. Two people who both wear a Large can differ in chest-to-waist drop, shoulder width and arm size. That difference is what the session is designed to expose.
Consent and privacy
Body measurements and photographs are personal data. Explain what you will record and why, get written consent, let wearers decline photographs, and store data securely. Data-protection law may apply depending on where you operate; check with your adviser.
Reference body data
Measure each wearer’s body before they try the garment. Published body measurement tables, such as ASTM D6240/D6240M for adult males with chest sizes 34 to 52, show how your wearers compare with a reference population and with the body measurements behind your size chart. Terminology for body dimensions was also set out in ASTM D5219, which ASTM lists as withdrawn in 2024; use its definitions only as a guide and state your own measuring method.
Step 2: The five measurements
For each wearer, record the body measurement and the garment measurement of the size worn at the same five points:
| Point | Body | Garment | What it tells you |
|---|---|---|---|
| Chest | Chest girth | Chest width × 2 | Ease at chest |
| Waist | Waist girth | Waist width × 2 | Ease and taper |
| Shoulder | Shoulder width | Shoulder width | Shoulder seam position |
| Upper arm | Bicep girth | Bicep width × 2 | Sleeve ease |
| Body length | Height or nape-to-waist | Body length | Length and ride-up |
Ease at each point is garment minus body. Over 12 wearers you can see the range of ease that wearers accept, which is more useful than any single opinion. Measure garments flat, as described in your tech pack, and measure bodies the same way each time.
Step 3: The movement checklist
Each wearer performs the same sequence in the sample. The fitter watches and notes where the garment pulls, rides up or gapes.
- Stand relaxed, arms by the side. Check shoulder seam position, neckline, side seams hanging straight, hem level.
- Raise both arms overhead. Check hem ride-up and pull at the underarm.
- Reach forward as if hugging. Check tension across the upper back and sleeve cap.
- Cross arms in front of the chest. Check back width and bicep.
- Sit on a chair and lean forward. Check waist and hem.
- Bend to touch the knees. Check back length exposure.
- Rotate the torso left and right. Check side seam twist and drag lines.
- Turn the head and look down. Check neckline comfort and rib.
Add any movement your customers make, such as lifting, cycling or a training exercise.
Step 4: The scoring sheet
Ask each wearer to score each zone on a scale with written anchors, so a “3” means the same to everyone:
| Score | Meaning |
|---|---|
| 1 | Restricts movement or is uncomfortable |
| 2 | Noticeably tight or loose; would not buy |
| 3 | Acceptable but not right |
| 4 | Good |
| 5 | Exactly as intended |
Zones to score: neckline, shoulders, chest, upper arm, waist, hem and length, plus an overall score. Record the wearer’s comments in their own words, and separately the fitter’s observations. Do not let wearers see each other’s scores.
Step 5: The record
Keep one row per wearer per zone in a spreadsheet:
| Field | Content |
|---|---|
| Wearer ID | Code, not a name |
| Size worn | As labelled |
| Body measurements | Five points |
| Garment measurements | Five points, measured on the sample worn |
| Scores | Seven zones plus overall |
| Comments | Wearer’s words |
| Fitter observations | Drag lines, ride-up, seam position |
| Photos | Reference numbers, with consent |
A single table makes the decision visible. It also gives your factory something concrete to work from, instead of a list of emails.
Step 6: Decide
Read the table zone by zone. A suggested starting rule, which you can adjust: flag a zone when a quarter or more of the wearers in a size score it 2 or lower, or when the fitter records the same fault on most wearers. Then decide the cause:
- Same fault across all sizes: a pattern shape issue, such as sleeve cap, armhole or shoulder slope. Change the base pattern.
- Fault only in the largest or smallest size: a grading issue. Change the grade rule, not the base size. Our article on grading rules for knit tops covers this.
- Fault only on wearers with a particular build: a fit-block choice. Decide whether that build is your customer; if it is, consider a second fit, as discussed in our article on big and tall basics.
- Fault that changes after washing: a fabric issue (stretch, recovery or shrinkage). Fix the fabric standard before the pattern.
- Label mismatch (wearers choose a size larger or smaller than their chart size): a size chart issue. See our article on vanity sizing.
Make all the changes for one round together, sample once, and repeat the session with as many of the same wearers as possible.
Running it with a factory
Send the factory the table, not only conclusions. A factory pattern maker can then see whether the fix is ease, shape or grade. Finetex’s apparel design service covers pattern making, grading and fit sampling, with development samples in 5–7 days and a graded size set in 10–12 working days according to its published FAQ, and asks for comments consolidated in one table per round. For underwear, the equivalent is our underwear wear test plan and fit sample review checklist.
Fact, advice and uncertainty
Fact: ASTM publishes adult male body measurement tables (D6240) and listed body-dimension terminology in D5219, now withdrawn; Finetex publishes its sampling and size-set lead times.
Advice: run a written protocol with about 12 matched wearers, five measurements, a fixed movement list and an anchored 1–5 scale; decide zone by zone and change the pattern once per round.
Uncertain: whether 12 wearers represent your whole market. They do not in a statistical sense; use the session to find pattern problems, and confirm the result with sell-through and returns data after launch, for example using our method for reading returns to diagnose fit.
Related reading
- Garment Measurement Points for Knit Tops: The 12 Numbers Buyers Argue About
- Grading Rules for Knit Tops: Where Size Sets Fail
- Vanity Sizing: Adjust the Chart or the Pattern?
- Muscle Fit and Athletic Fit T-Shirts: Pattern Changes That Matter
Frequently asked questions
Why 12 wearers?
It is a practical number for one day of fittings and gives several bodies per core size. It is a recommendation, not a statistical requirement; more wearers give more confidence.
Which measurements matter most for a T-shirt fit session?
Chest, waist, shoulder width, upper arm and body length, recorded on both body and garment so you can calculate ease.
Should wearers wash the sample first?
Run the first session on unwashed samples, then repeat key wearers after the wash cycles in your care label. Fit can change with shrinkage and loss of recovery.
Can a factory run the fit session for me?
A factory can measure and fit on its own staff, but they rarely match your customers. Run the session with your own target wearers and send the factory the results table.
Sources
- ASTM D6240/D6240M: Standard Tables of Body Measurements for Adult Male, Chest Size Range 34–52
- ASTM D5219: Standard Terminology Relating to Body Dimensions for Apparel Sizing (withdrawn 2024)
Turn your fit session into a pattern change
Send us your results table, size chart and current sample. Our pattern makers will propose the changes by zone and size, and sample the next round for your wearers.
Request a quote or read our T-shirt fit and fabric guide.
More factory-floor notes for brand owners
Selling Underwear in Germany: Textilkennzeichnung, LUCID and Packaging Law
German textile labelling, LUCID registration and packaging law for underwear brands after the PPWR and VerpackDG took effect…
Read more →
GSM to Ounce Converter and Fabric Weight Chart
Convert fabric weight between gsm and oz/yd² with the exact factor (1 oz/yd² = 33.906 g/m²), a T-shirt…
Read more →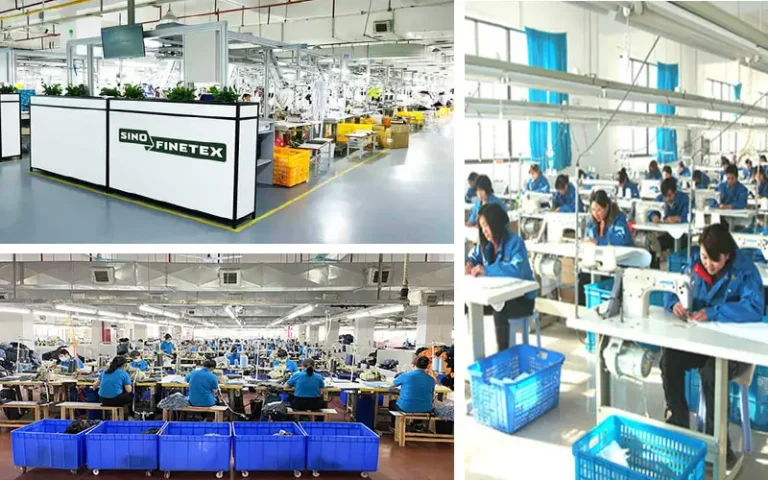
First-Output Check: The In-Line Inspection That Saves Bulk
What to check on the first garments off each line: measurements, seams, labels and print against the approved…
Read more →
Corporate Uniform Programs: Tendering, Sizing and Reorders
How to run a corporate uniform program with a factory: tender documents, sizing a workforce, producing many sizes…
Read more →
Muscle Fit and Athletic Fit T-Shirts: Pattern Changes That Matter
How muscle fit and athletic fit T-shirts differ from a classic block: chest-to-waist drop, sleeve cap and bicep,…
Read more →
Currency Exposure for Apparel Buyers: Pricing in USD vs CNY
How USD/CNY moves change apparel costs and margins, with official 2025–2026 rate data, plus hedging options, quote validity…
Read more →Request a sample & pricing information
Send us your tech pack, target price or a reference sample — we reply with a quotation, a realistic lead time and a fabric recommendation within one working day.
- Free sampling plan & cost breakdown
- MOQ from 300 pcs per style
- Reply within 1 working day